Getting Started
- to your AI Assistant portal
- Navigate to Campaign Manager in the left navigation bar
- Click + Create Campaign
- Choose a template or select Create from Scratch (see Campaign Templates for details on available templates)
- Enter a Campaign Name in the popup that appears, then confirm to create the campaign
You can edit the campaign name later in the campaign configuration.
- Campaign Basics — Campaign details and schedule (toggle Multi-Assistant Campaign here when needed).
- Delivery & Timing — Channels, messaging, and execution settings.
- Behavior & Rules — Knowledge, instructions, and eligibility criteria.
Creating a Simple Campaign
Simple campaigns are designed for one-time outreach where each contact is reached once through a single channel.Step 1: Campaign Basics

Step 2: Delivery & Timing
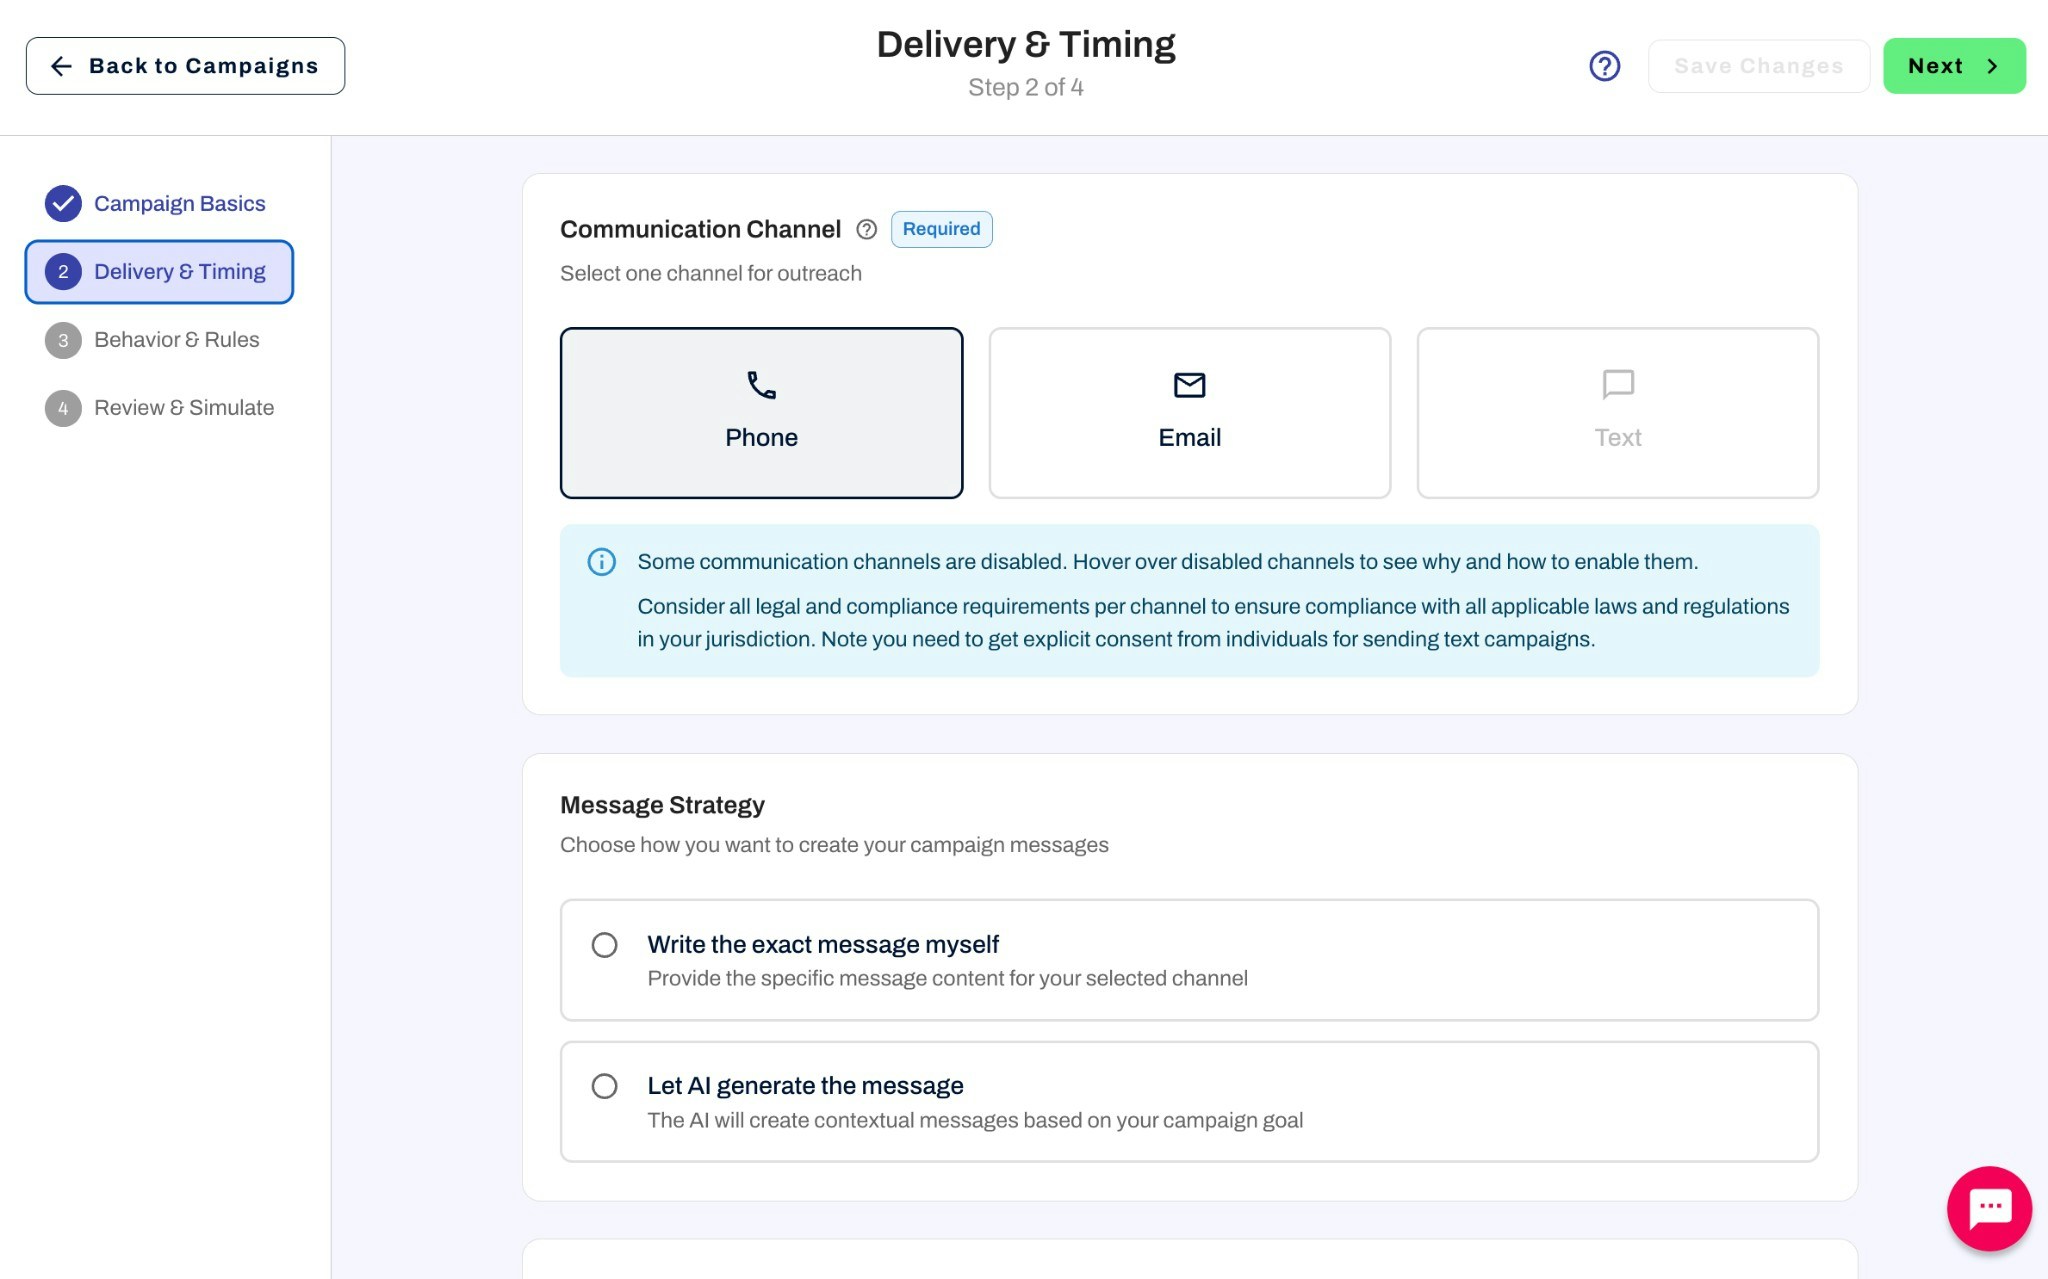
Communication Channel (required)
Select one channel for outreach: Phone, Email, or Text.Some communication channels may be disabled. Hover over disabled channels to see why and how to enable them. Consider all legal and compliance requirements per channel to ensure compliance with all applicable laws and regulations in your jurisdiction. You need to get explicit consent from individuals for sending text campaigns.
Message Strategy
Choose how you want to create your campaign messages:- Write the exact message myself — Provide the specific message content for your selected channel
- Let AI generate the message — The AI will create contextual messages based on your campaign goal
Campaign Execution
Choose when you want this campaign to run: Run at a specific date & time — Schedule your campaign to start at a precise date and time. All contacts in the list will be contacted at the scheduled time.- Scheduled Date (required): When the first outreach will be sent (MM/DD/YYYY)
- Scheduled Time: Select a specific time or choose “As soon as possible.” Time is based on the timezone set in .
After the scheduled date passes, the campaign switches to an “as soon as contacts are added” mode — any new contacts added to the campaign will be reached out to immediately. There is currently no option to re-schedule for a future date.
- Complete your campaign configuration and add your contacts
- Press Go Live to mark the campaign as active
- Click Start all outreaches to begin contacting all contacts in the list
- Once the campaign finishes, you can add new contacts and click Start all outreaches again to reach the new contacts
When you re-run a manual campaign, it will also retry contacts that failed during the previous run. If you don’t want failed contacts to be retried, remove them from the contact list before starting again. Contacts with a Completed status will not be reached out to again.
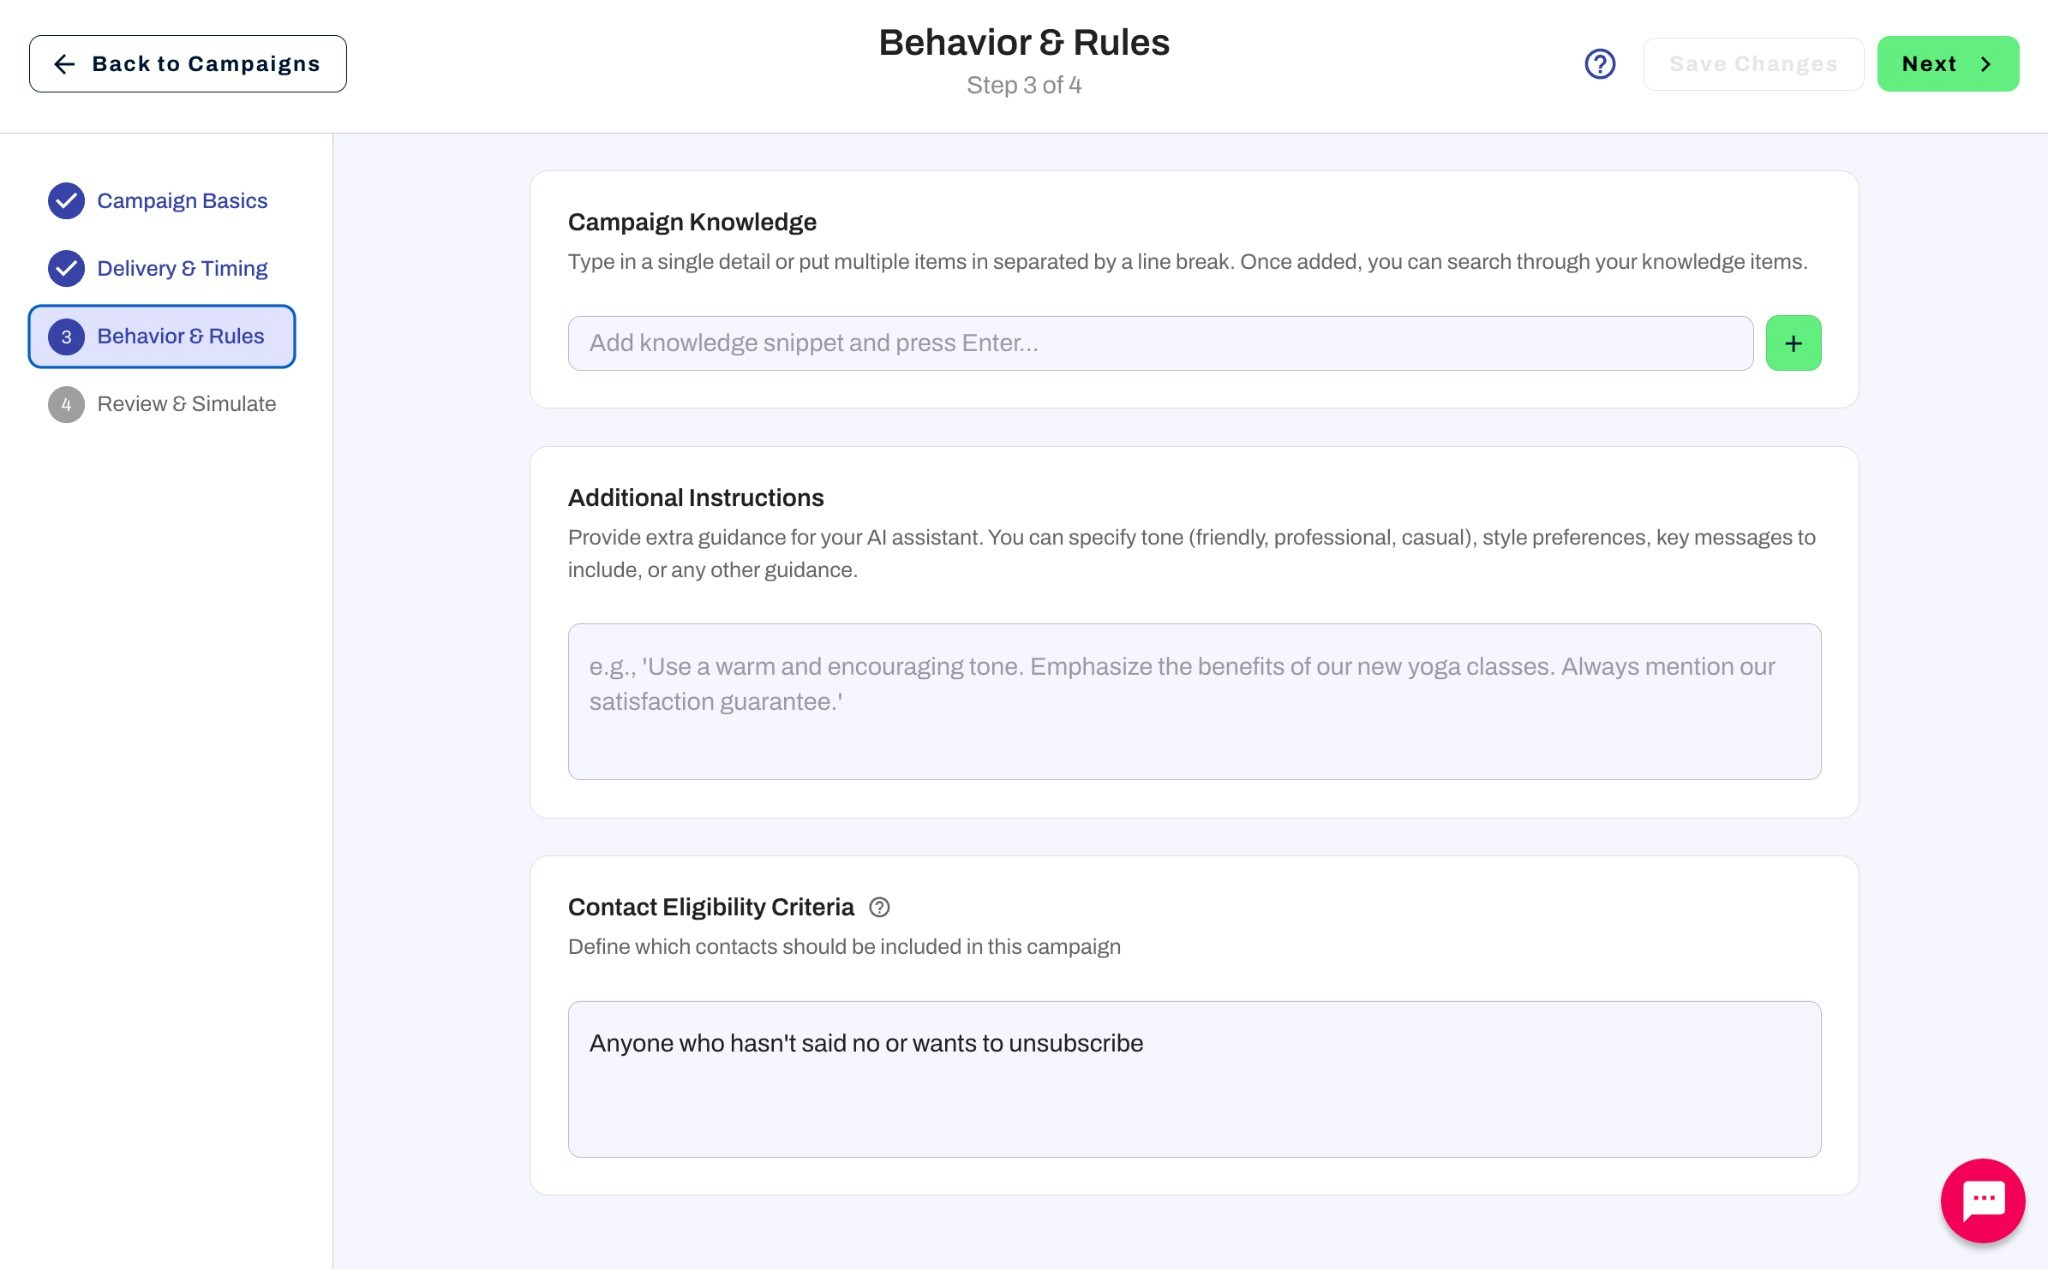
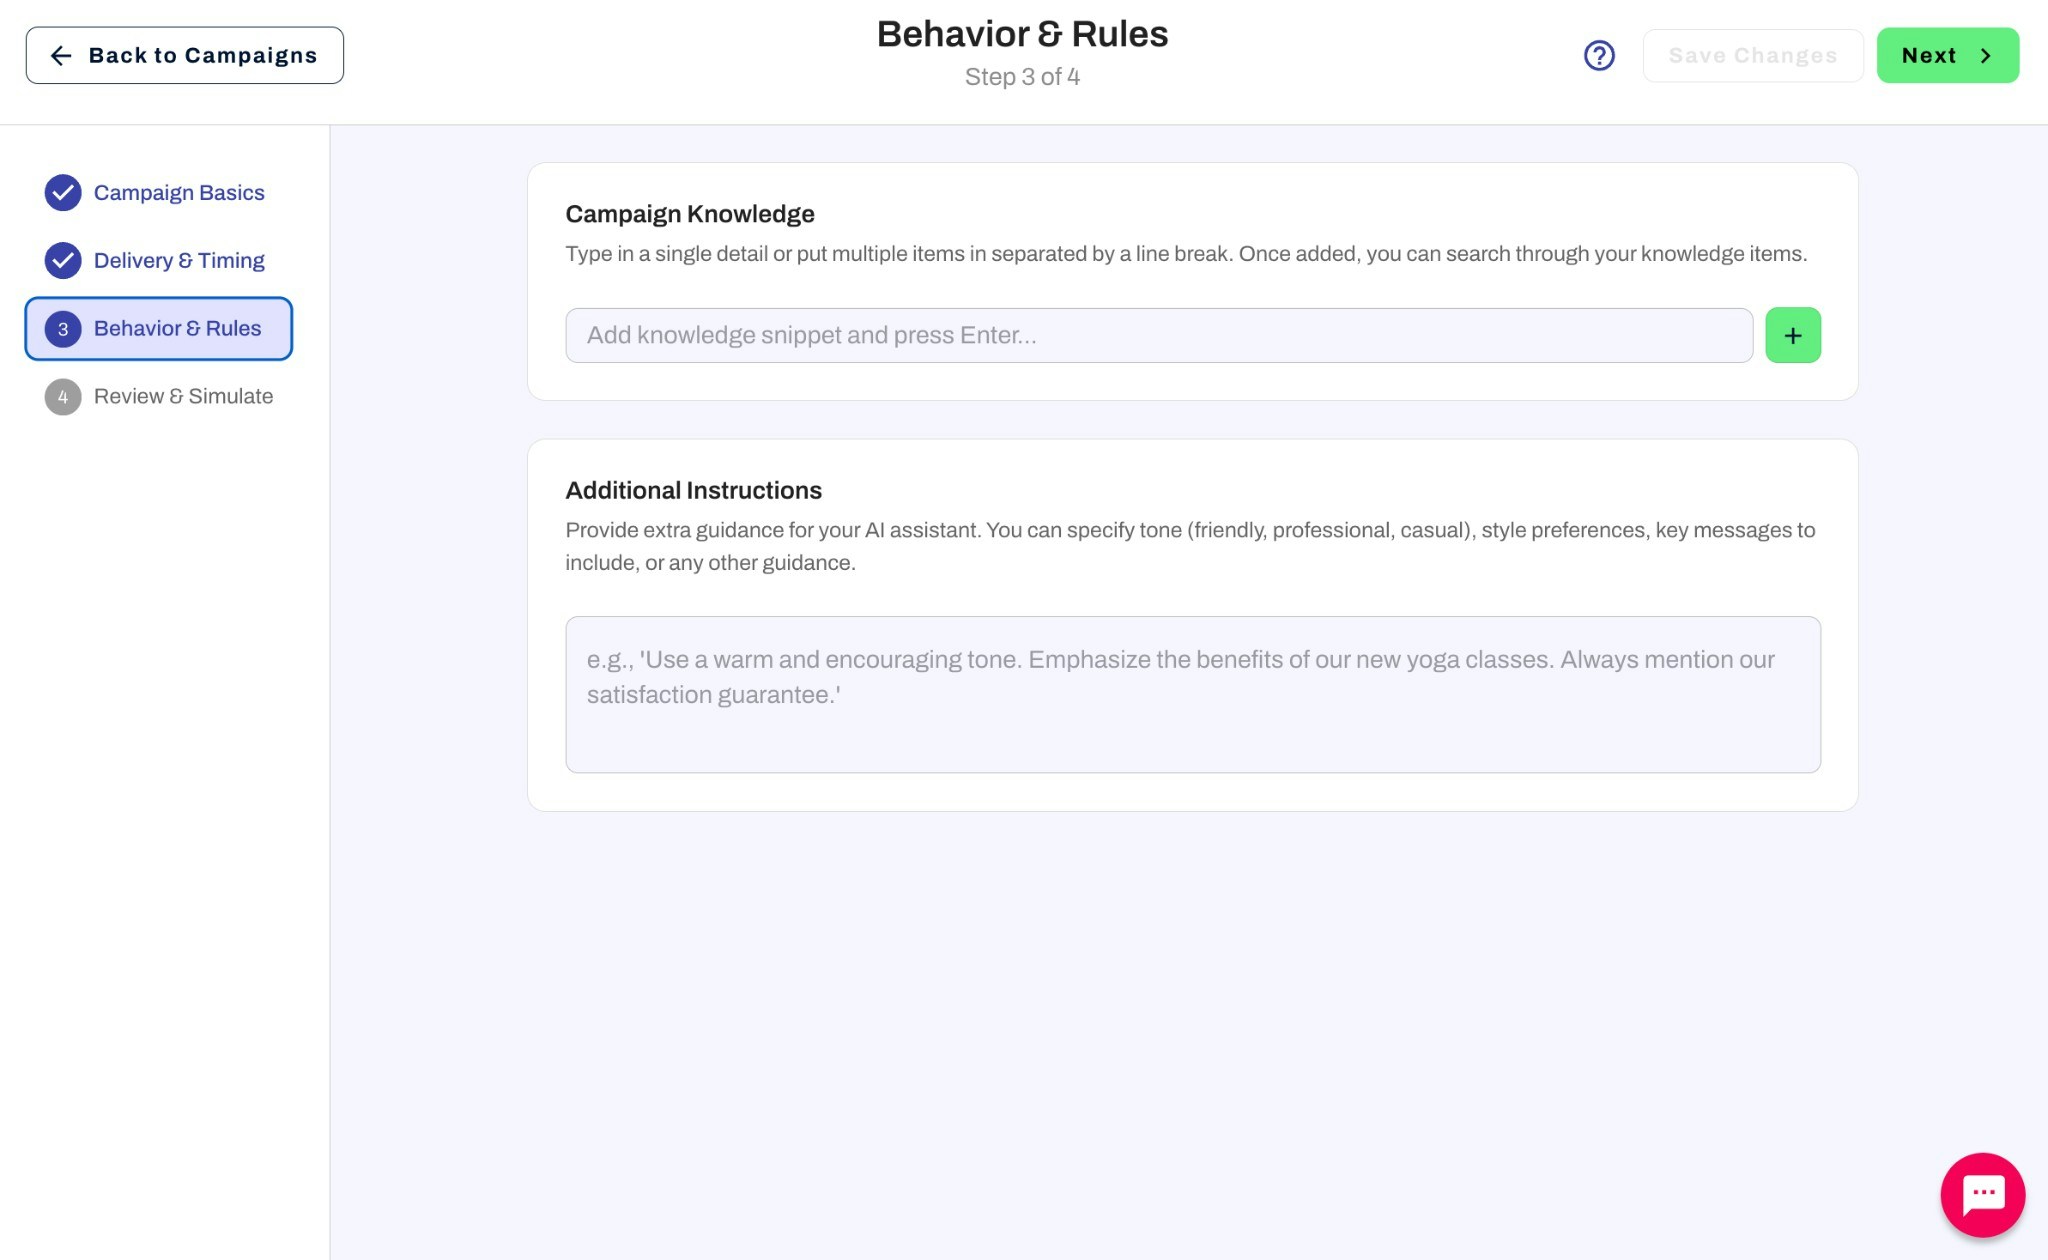
Step 3: Behavior & Rules
Saving and simulation
After Behavior & Rules, save to finish—for example Save and Manage Campaign—or finish Multi-Assistant Setup when Multi-Assistant is on (Multi-Assistant Campaigns). Use Simulate campaign from the campaign edit or management view to rehearse outreach. See Managing Your Campaign once the campaign exists.Creating an Ongoing Campaign
Ongoing campaigns are designed for automated, multi-step outreach with scheduled follow-ups across one or more channels.Step 1: Campaign Basics
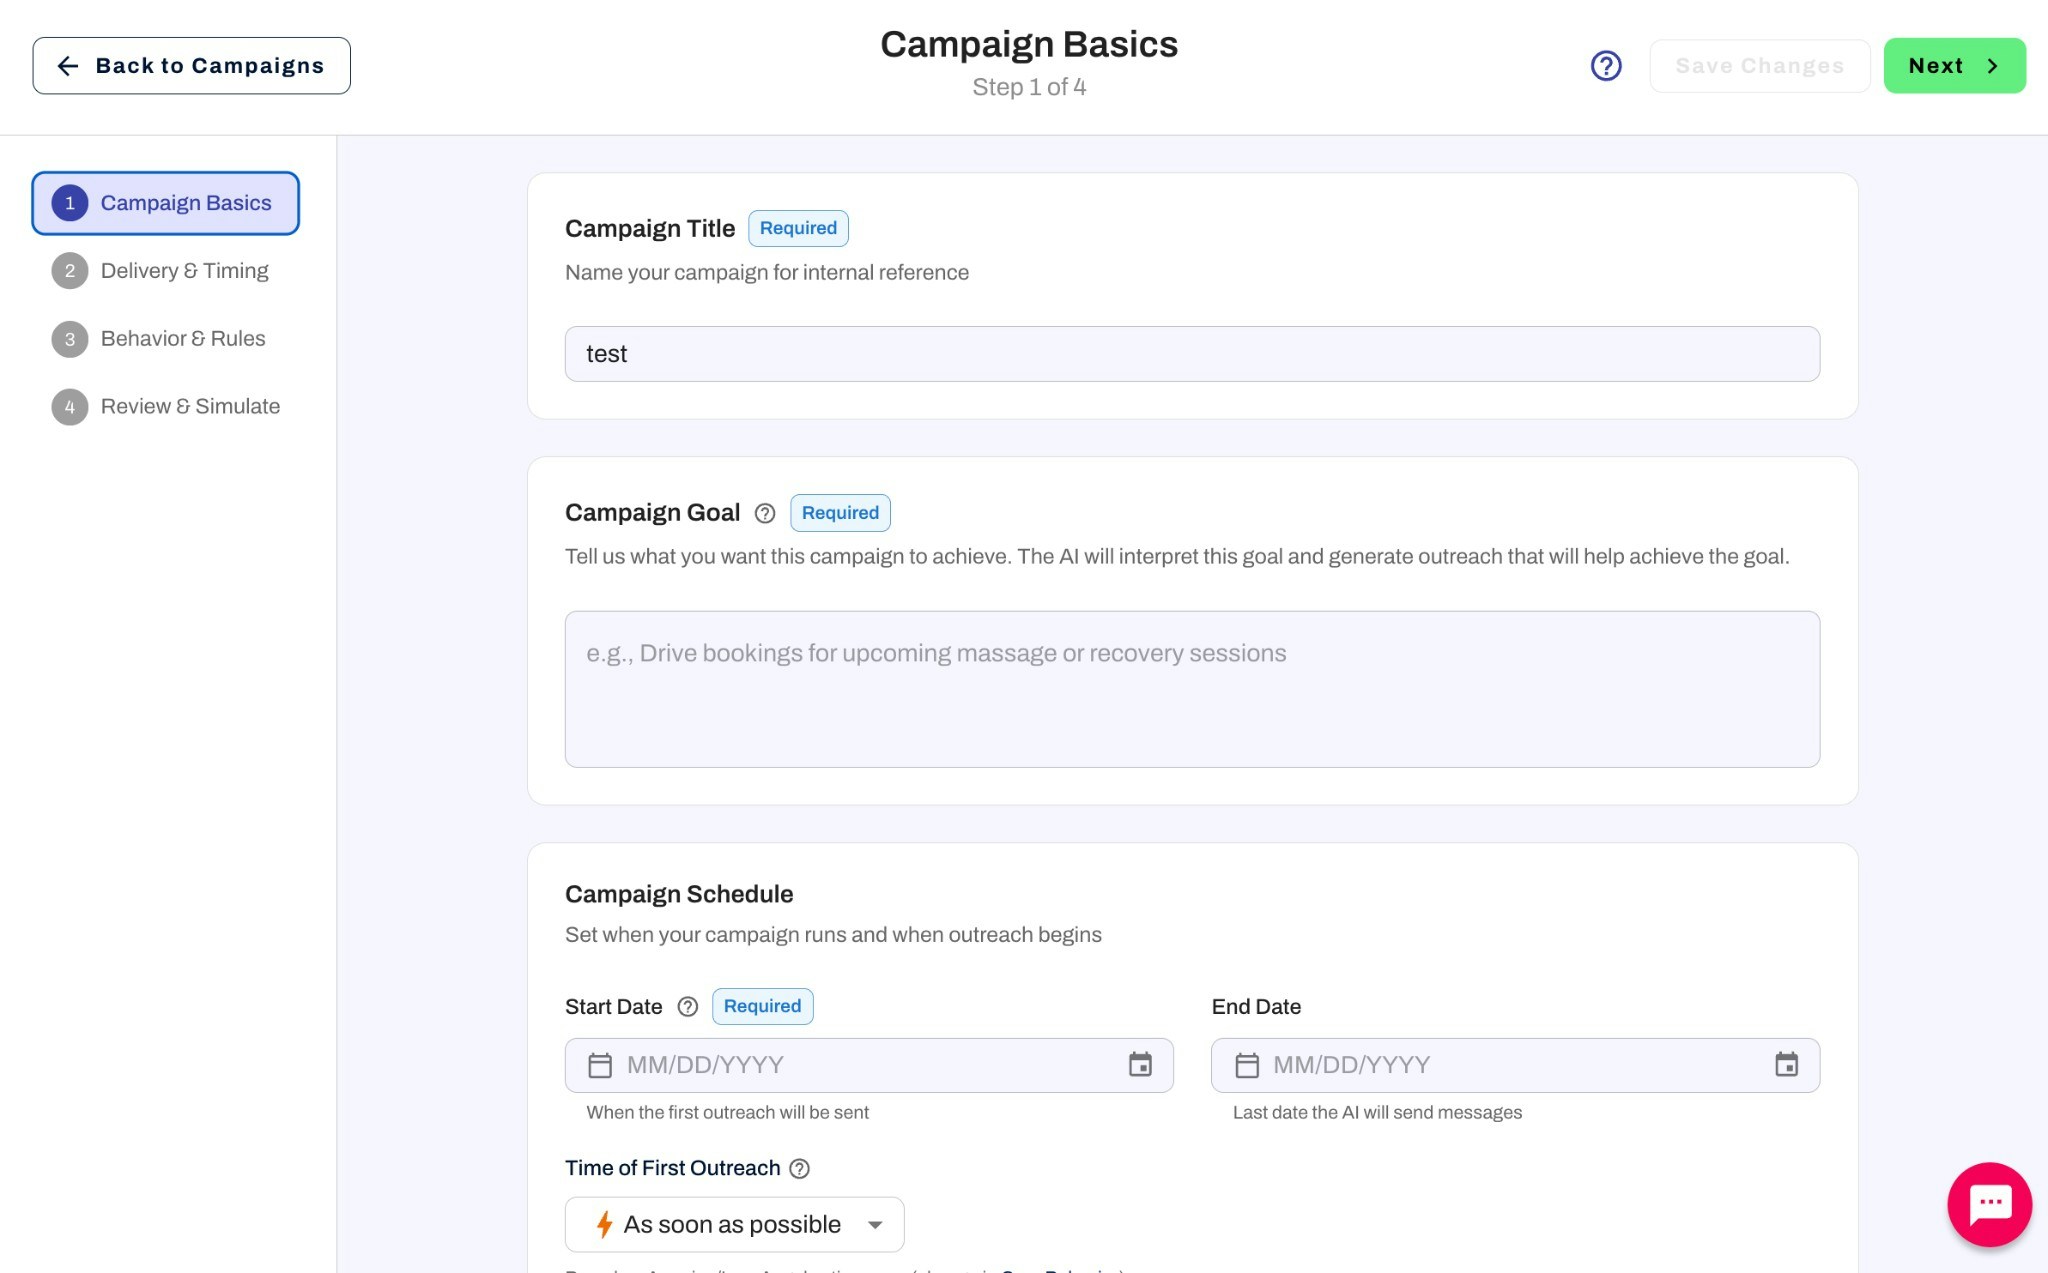
- Start Date (required): When the first outreach will be sent (MM/DD/YYYY)
- End Date: Optional. If provided, this will be the last date the AI will send messages.
- Time of First Outreach: Specify when the first outreach should occur. Select a specific time or choose “As soon as possible.” Time is based on the timezone set in .
Step 2: Delivery & Timing
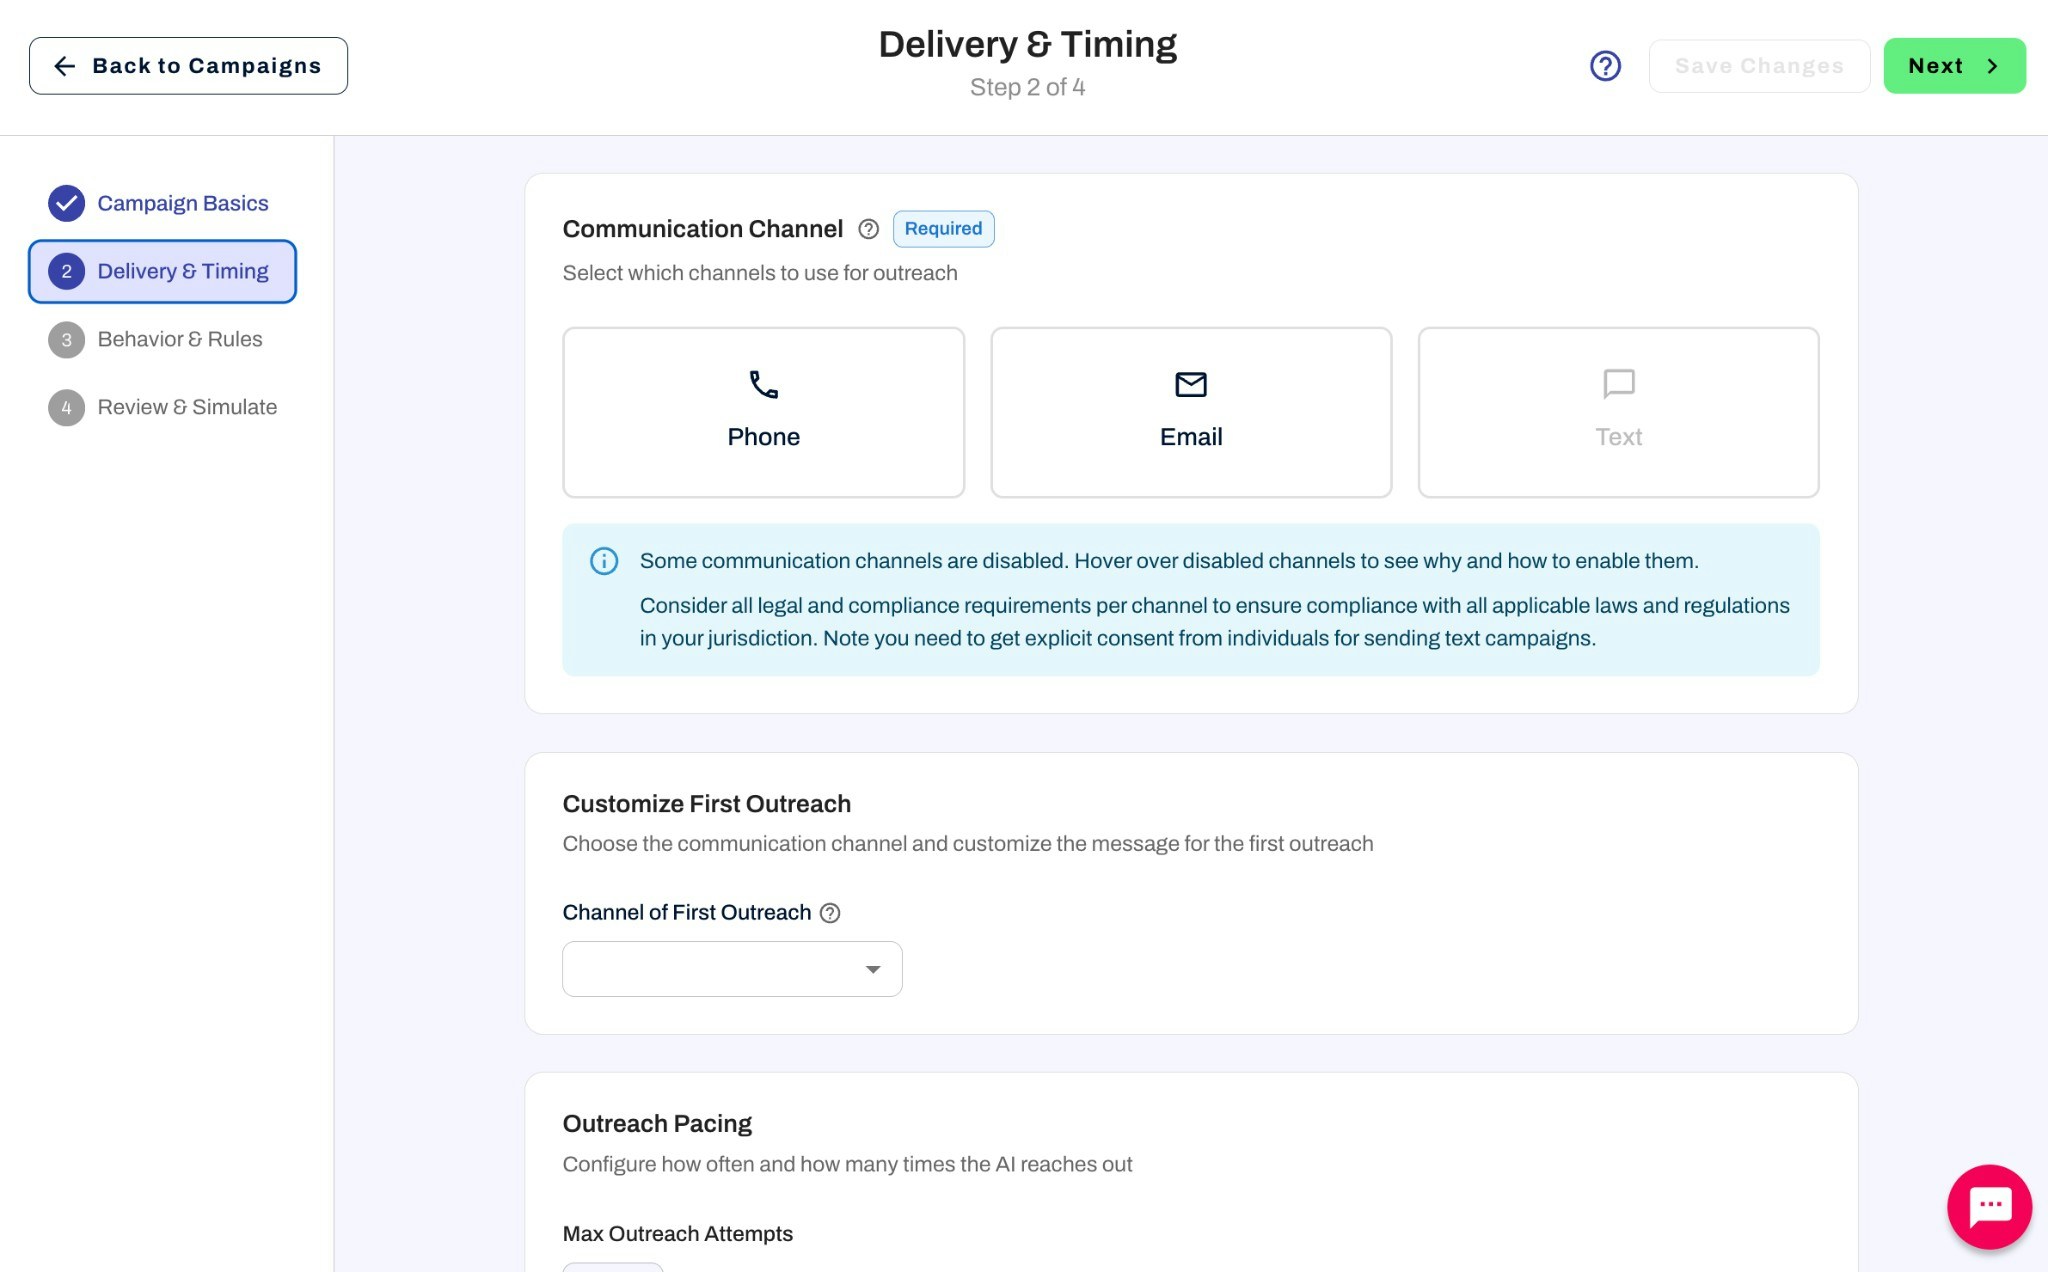
Communication Channel (required)
Select one or more channels for outreach: Phone, Email, and/or Text.Some communication channels may be disabled. Hover over disabled channels to see why and how to enable them. Consider all legal and compliance requirements per channel to ensure compliance with all applicable laws and regulations in your jurisdiction. You need to get explicit consent from individuals for sending text campaigns.
Customize First Outreach
Channel of First Outreach: Choose which communication channel the AI should use for the first outreach to each contact.Outreach Pacing
Configure how often and how many times the AI reaches out: Max Outreach Attempts: Set the maximum number of times each contact can be messaged or called in this campaign (e.g., 3 attempts per contact before stopping). Follow-Up Frequency: Choose how frequently the AI follows up with contacts:| Frequency | Interval |
|---|---|
| Aggressive | Every day |
| Moderate | Every 2 days |
| Balanced | Every 3–4 days |
| Relaxed | Every 7 days |
| Custom | Set your own interval |
Step 3: Behavior & Rules